Tesla Model 3: 5-Way Valve- Remove
Tesla Model 3 2017-2024 Service Manual / Thermal Management / Cooling System / 5-Way Valve (Remove and Replace) / 5-Way Valve- Remove
SPECIAL TOOLS
Wrench, Diverter Valve, Model 3 (1447556-00-A)
Remove
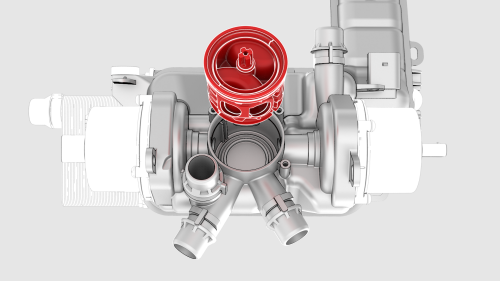
- Remove the 5-way valve actuator. See Actuator - 5-Way Valve (RWD) (Remove and Replace).
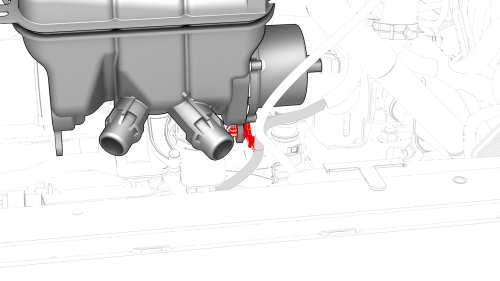
- Release the clip that attaches the electrical harness to the lower LH side of the superbottle.
- Position a coolant drain under the superbottle
- Disconnect the powertrain supply hose at the lower LH side of the superbottle, and then plug the female connector.
Note: Allow the coolant to drain from the superbottle
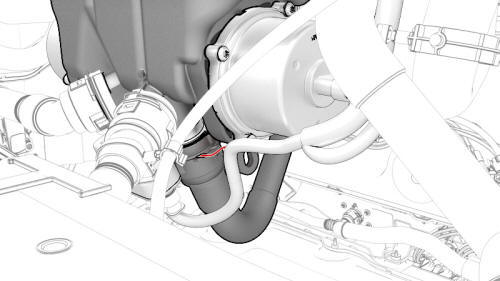
- Remove and discard the screws that attach the 5-way valve actuator cover to the superbottle, and then remove the cover from the superbottle.
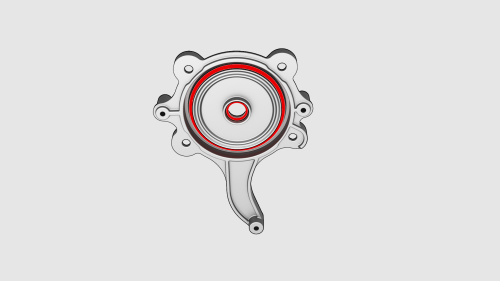
- Remove and discard the O-rings from the 5-way valve cover.
- Remove the stem shell from the superbottle.
READ NEXT:
 5-Way Valve - Install
Install
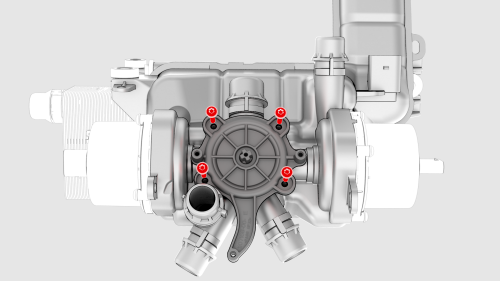
Install new O-rings onto the 5-way valve cover.
Note: Align notches in the o-rings with the ribs in the 5-way valve
cover.
Examine the end the of the 5-way valve stem shell shaft. One sh
Actuator - 5-Way Valve (Dual Motor) (Remove and Replace)
SPECIAL TOOLS
Kit, Svc Plug, Cooling Hose, Model 3 (1135762-00-A)
Wrench, Diverter Valve, Model 3 (1447556-00-A)
Remove
Remove the superbottle. See Superbottle (Dual Motor) (Remove and
Replace).
Actuator - 5-Way Valve (RWD) (Remove and Replace)
SPECIAL TOOLS
Wrench, Diverter Valve, Model 3 (1447556-00-A)
Remove
Disconnect 12V power. See 12V Power (Disconnect and Connect).
Remove the front aero shield. See Panel - Aero Shield - Front (Re
SEE MORE:
Headlight - LH- Install
Install
Install the LH headlight to the vehicle.
Caution: Do not damage the headlight during installation.
Install the fastener(s) that attach the LH headlight to the body.
Torque 5.9 Nm
Install the bolt that attaches the fender bracket to the body.
Torque 3 Nm
Connec
Crush Can - Front - LH - Install
Install
Install the LH front crush can into the LH front inner rail.
Note: Lightly tap the crush can with a dead blow harmer to assist
with installation into the inner rail.
install the bolt that attaches the LH front fender support to the LH
front crush can.
Torque
35 Nm
Instal
© 2019-2024 Copyright www.tmodel3.com
