Tesla Model 3: Applique - B-Pillar - LH (Remove and Replace) - Install
Tesla Model 3 2017-2025 Service Manual / Exterior Fittings / Exterior Trim / Applique - B-Pillar - LH (Remove and Replace) / Applique - B-Pillar - LH (Remove and Replace) -
Install
Install
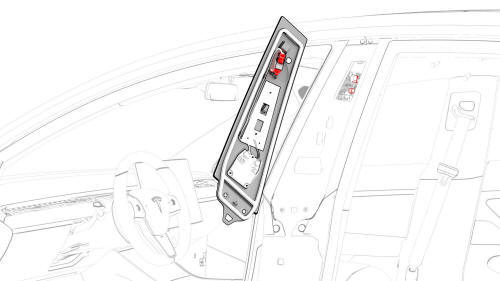
- Connect the camera connectors to the B-pillar applique, and then position the applique onto the vehicle.
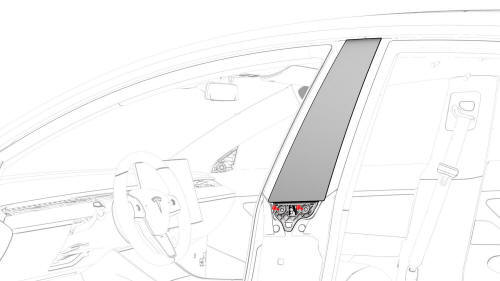
- Install the bolts that attach the B-pillar applique to the body. Torque 5 Nm
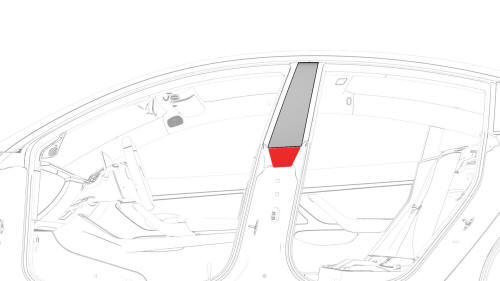
- Position the B-pillar applique fastener cover onto the vehicle, and then engage the clips that attach the B-pillar applique fastener cover to the vehicle.

- Close the LH rear door.
- Update the vehicle firmware using a laptop connected to Garage.
- Connect a laptop with Toolbox to the vehicle.
- Close the LH front door.
- Click on the "Dashboard" tab
- Click on "Service Tools".
- Click on "DAS Image Capture".
- Click on "Capture Image" to check the current settings.
- Review the images to make sure all cameras are able to capture images correctly.
- Verify that all key cards work on the B-pillar applique as designed.
READ NEXT:
 Brightwork - Upper - LH (Remove and Replace)
Remove
Open the LH doors.
Pull down to release the front and rear primary body seals from the LH
upper brightwork.
Note: It is not necessary to release the seals from the top
of the B-p
Cover - Rocker Panel - Lower - LH (Remove and Replace)
Remove
Release the LH lower rocker panel bolt covers.
Remove the bolts that attach the LH lower rocker panel cover to the
body.
Torque 5 Nm
Front
Rear
Release the cli
SEE MORE:
Drop Link - Stabilizer Bar - Rear - LH (Remove and Replace)
Remove
Remove the mid aero shield. See
Panel - Aero Shield - Mid (Remove and Replace).
Remove and discard the nuts that attach the LH drop link to the rear
stabilizer bar and rear LH knuckle.
Torque 55 Nm
Remove the drop link from the vehicle.
Install
Installation procedure is the re
Finisher - Vent (Remove and Replace)
Remove
Remove the LH instrument panel end cap. See
End Cap - Instrument Panel - LH (Remove and Replace).
Remove both the LH and RH air wave end caps. See
End Cap - Air Wave - LH (Remove and Replace).
Remove the main instrument panel decor trim. See
Decor Trim - Instrument Panel - Main (Rem
© 2019-2025 Copyright www.tmodel3.com
