Tesla Model 3: Coolant Pump - HV Battery - Install
Tesla Model 3 2017-2024 Service Manual / Thermal Management / Cooling System / Coolant Pump - HV Battery (Remove and Replace) / Coolant Pump - HV Battery - Install
Install
- Remove and discard any o-rings or debris in the superbottle where the coolant pump will install.
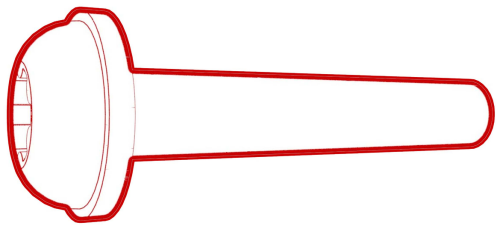
- Make sure that new o-rings are installed onto the new coolant pump.
- Lubricate the o-rings with Silaramic lubricant.
- Position the outlet of the coolant pump in the up position, and insert the coolant pump into the superbottle.
- Make sure that the coolant pump is fully seated in the superbottle.
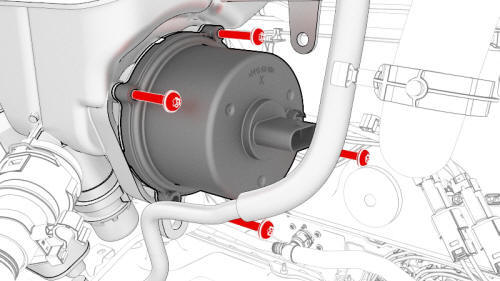
- Hand-tighten new screws to attach the coolant pump to the superbottle.
- Tighten the coolant pump screws in a cross-pattern.
 Torque 1.8 Nm
 - Connect the electrical harness to the coolant pump connector.
.jpg)
.jpg)
- Fasten the clip that attaches the electrical harness to the superbottle.
- Connect 12V power. See 12V Power (Disconnect and Connect).
- Perform a cooling system vacuum refill. See Cooling System (Vacuum Refill).
- Install the underhood storage unit. See Underhood Storage Unit (Remove and Replace).
- Install the cabin intake duct assembly. See Duct - Cabin Intake (Remove and Replace).
- Remove the coolant drain from under the vehicle.
- Install the front aero shield panel. See Panel - Aero Shield - Front (Remove and Replace).
READ NEXT:
 Coolant Pump - Powertrain (Remove and Replace)
Remove
Remove the underhood storage unit. See Underhood Storage Unit (Remove
and Replace).
Disconnect 12V power. See 12V Power (Disconnect and Connect).
Remove the front aero shield panel. See P
Cooling System (Check and Fill)
Remove
Remove the rear underhood apron. See Underhood Apron - Rear (Remove and
Replace).
Remove the cabin intake duct. See Duct - Cabin Intake (Remove and
Replace).
Remove the outer HVAC ple
SEE MORE:
Valance - Front Fascia (Remove and Replace)
Remove
Remove the front aero shield panel.
Release the clips (x2) that attach the valance to the stabilizer bar
brackets.
Remove the push clips (x4) that attach the LH and RH sides of the
valance to the wheel liners.
Note: Remove the outer clips as necessary to allow for easier
ac
Touchscreen Overview
The features and information you need to drive Model 3 are displayed on the touchscreen. When driving, the touchscreen displays driving-related information such as driving speed, vehicle range, warnings, etc. The touchscreen is used to control many features that, in traditional cars, are controll
© 2019-2024 Copyright www.tmodel3.com
