Tesla Model 3: Crush Can - Front - LH - Remove
Tesla Model 3 2017-2024 Service Manual / Body / Bumper / Fascia / Crush Can - Front - LH (Remove and Replace) / Crush Can - Front - LH - Remove
Remove
- Raise and support the vehicle
- Remove the rear underhood apron.
- Remove the cabin intake duct
- Remove the hood latch cover.
- Remove the underhood storage unit.
- Remove the front fascia assembly
- Disconnect the electrical harness from the LH front airbag sensor connector.
- Disconnect the electrical harness from the center front airbag sensor connector.
- Disconnect the electrical harness from the RH front airbag sensor connector.
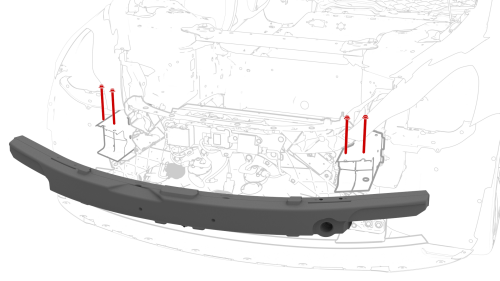
- Remove the bolts that attach the front bumper with the energy absorbers to the LH and RH crush cans.
.jpg)
- Carefully remove the front bumper with the energy absorbers from the vehicle.
Caution:
Do not damage the body when prying the front bumper.
Note:
Lightly tap the front bumper with a dead blow harmer to assist with removal of the front bumper.
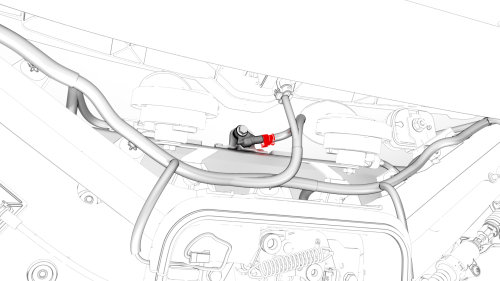
Remove the bolts (x2) that attach the bottom of the cooling fan module to the ankle catcher, and then set the cooling fan module onto the front subframe.
Note: Lift the condenser fan module up to ease removal of the bolts.
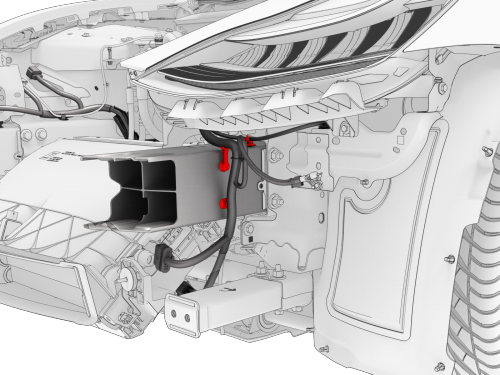
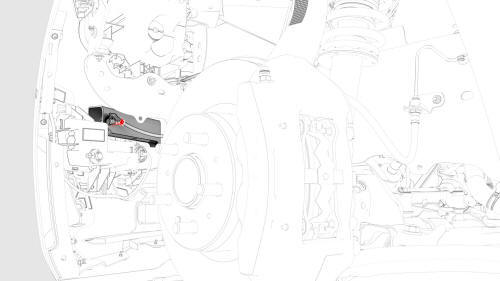
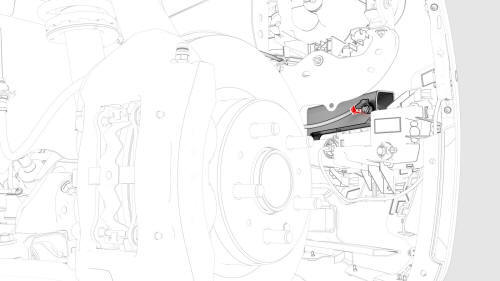
- Release the clips (x3) that attach the electrical harness to the LH front crush can.
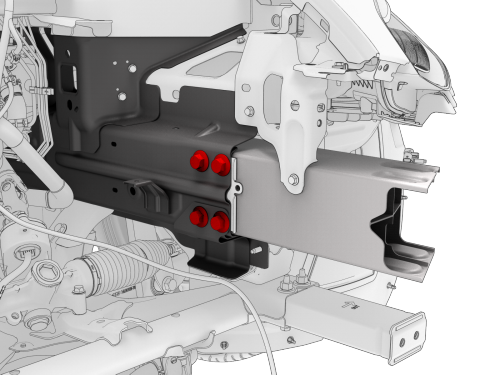
- Remove the bolts (x4) that attach the LH front crush can to the LH front inner rail.
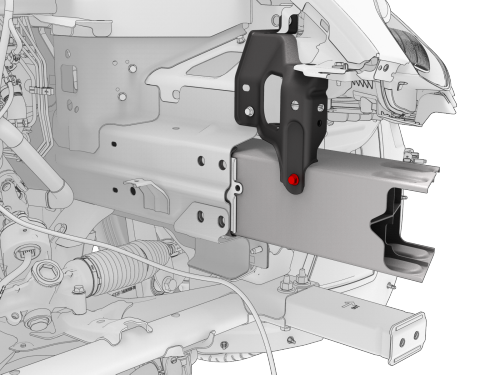
- Remove the bolt that attaches the LH front fender support to the LH front crush can.
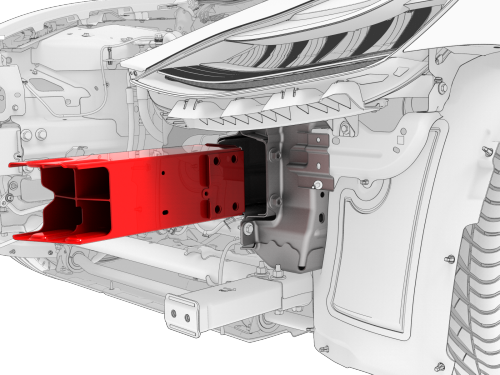
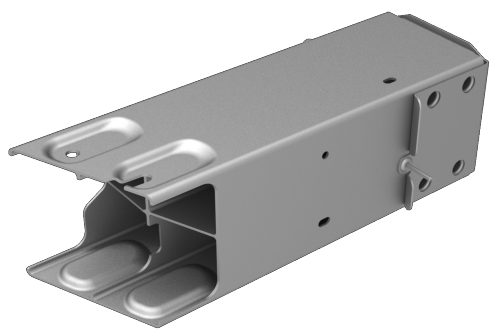
- Remove the LH front crush can from the LH front inner rail.
READ NEXT:
 Crush Can - Front - LH - Install
Install
Install the LH front crush can into the LH front inner rail.
Note: Lightly tap the crush can with a dead blow harmer to assist
with installation into the inner rail.
install the bo
Fascia - Front (Remove and Install)
Remove
Remove the rear underhood apron.
Remove the cabin intake duct.
Remove the hood latch cover.
Remove the underhood storage unit carpet
Remove the underhood storage unit.
Remove th
SEE MORE:
Procedure
Special tools required for this procedure:
SPECIAL TOOLS
Pliers, Clip Removal (1133569-00-A)
On a wall, measure 14.5 in (36.8 cm) from the floor, and then apply a
length of 1-inch masking tape horizontally to the wall to mark the
measurement.
Measure 25 ft (7.62 m) from the wall, and then a
Shield - Dust - Brake - Rear - LH and RH (Retrofit) - Install
Install
Install the bolts that attach the LH rear brake dust
shield to the knuckle.
Torque 8 Nm
Use a magnetic field viewing card to check t
© 2019-2024 Copyright www.tmodel3.com
