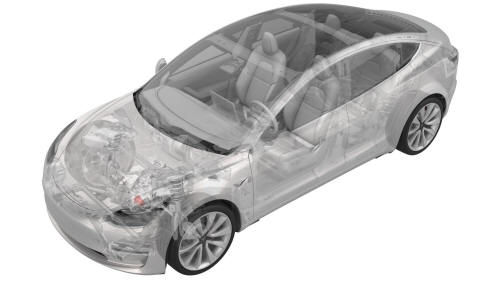
Tesla Model 3: Oil Pump - Front Drive Unit - Remove
SPECIAL TOOLS
3/4 Ton Underhoist Stand (1081765-00-A)
Remove
- Remove the front aero shield panel. See Panel - Aero Shield - Front (Remove and Replace).
- Drain the front drive unit gearbox fluid. See Gearbox Fluid - Front Drive Unit (Drain and Refill).
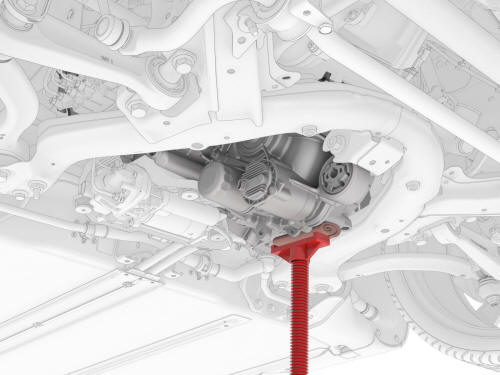
- Support the LH side of the front drive unit with an underhoist stand, as shown.
Caution: Place a show towel between the underhoist stand and front drive unit.
.png)
-
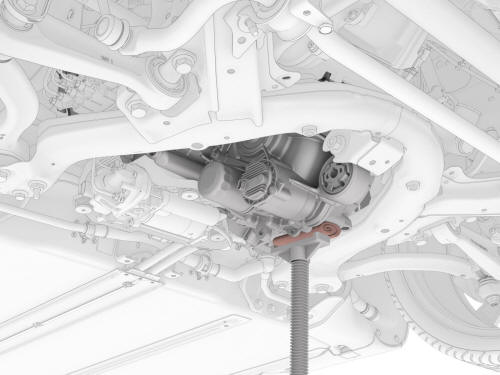
Remove the bolt that attaches the front drive unit to the front subframe.
.png) Torque 80 Nm
Torque 80 Nm
- Carefully lower the front underhoist stand until the front drive unit oil pump is accessible.
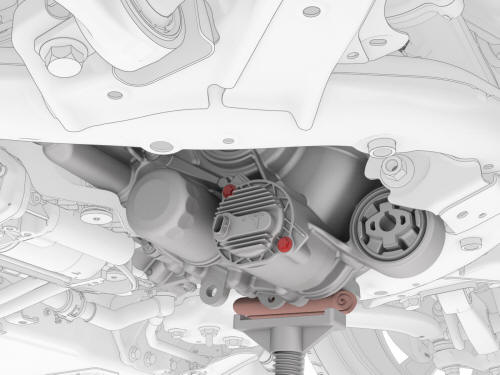
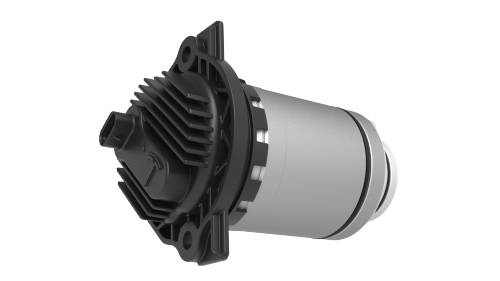
- Remove the bolts that attach the front drive unit oil pump to the front drive unit. Torque 5 Nm + 20 degrees
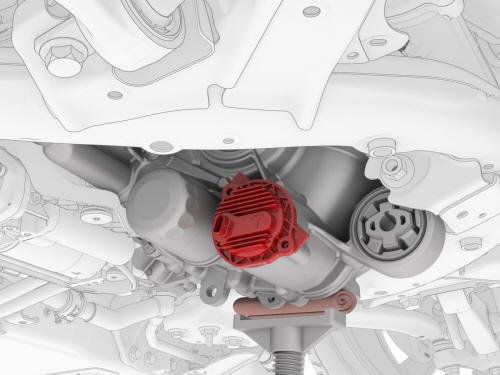
- Remove the front drive unit oil pump.
Tip:
Use the front drive unit as a fulcrum to
leverage out the oil pump.
READ NEXT:
 Oil Pump - Front Drive Unit - Install
Install
Installation procedure is the reverse of removal, except for
the following:
Lubricate the front drive unit oil pump o-rings with
ATF-9.
Use Toolbox to up
Oil Screen - Front Drive Unit (Remove and Replace)
SPECIAL TOOLS
KIT, DRIVE UNIT OIL DRAIN, MODEL 3 (1134264-00-A)
KIT, DRIVE UNIT OIL FILL, MODEL 3 (1139126-00-A)
Tool, DUF Dipstick, Model 3 (1446276-20-A)
SWITCHBOX, OIL PUMP, MODEL 3 (1131264-00-A
Seal - Oil - Differential to Halfshaft - Front Drive Unit - LH (Remove and
Replace)
SPECIAL TOOLS
Tool, Axle Extraction, Model 3 (1133386-00-A)
Tool, Hub Puller, Hydraulic (1096075-00-A)
Install Tool, Output Seal, Model 3 (1131206-00-A)
Tool, Seal Puller, Adjustable (1052583-00-A)
SEE MORE:
Stabilizer Bar - Front (Remove and Replace)
Remove
Remove the front fascia valance. See
Valance - Front Fascia (Remove and Replace).
LH side shown, RH similar
Remove and discard the nuts that attach the front stabilizer bar to the
LH and RH front stabilizer bar links, and then move the front stabilizer bar
links aside.
Torque
Actuator - Latch - Hood - Secondary (Remove and Replace)- Install
Install
Install the bolts that attach the secondary hood latch actuator to the
front end carrier.
Torque 5 Nm
Connect the electrical connector to the secondary hood latch actuator.
Install the clip that attaches the secondary hood latch actuator to the
front end carrier.
