Tesla Model 3: Polish
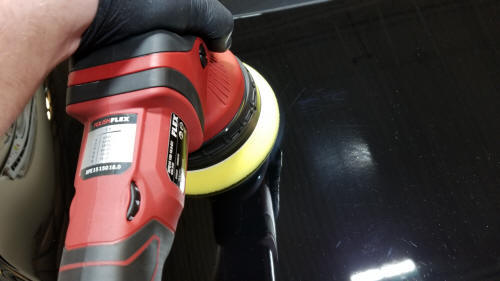
Remove the cutting pad from the buffer, and then install a polishing pad on the buffer.
Apply 4 evenly spaced 20 mm diameter dollops of polishing compound on the polishing pad.
Set the buffer speed according to region, and while the buffer is off, place the tool on top of the affected area.
- NA: setting 3
- APAC: TBD
- EMEA: TBD
- Keeping the pad flush with the body panel, activate the buffer for 5 seconds, making 1 foot long side to side swipes over the affected area.
- Turn off the buffer and remove the buffer from the body panel only when the pad stops spinning.
- Remove the polishing compound from the body panel with a clean microfiber towel, and then identify any remaining hazing/swirling.
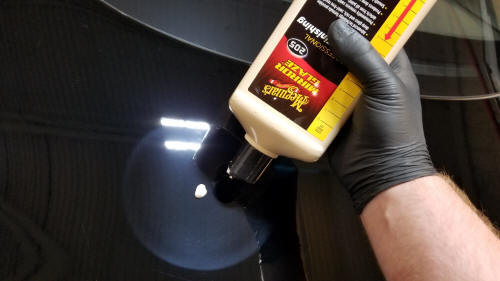
- Apply one 5 mm diameter dollop to the center of the remaining hazing/swirling.
- Set the buffer speed according to region, and while the buffer is off, place the buffer on top of the hazing/swirling.
- NA: setting 5
- APAC: TBD
- EMEA: TBD
- Keeping the pad flush with the body panel, activate the buffer.
- Apply pressure until the buffer begins to stall, and then reduce pressure until the buffer rotates normally.
- At a rate of 0.5 inches per second, move the buffer side to side in a 1 foot area centered on the hazing/swirling.
- Turn the buffer off after 30 seconds or when the polishing compound begins to dissipate. Remove the buffer from the body panel only when the pad stops spinning.
- Remove the polishing compound from the body panel with a clean microfiber towel, and then inspect the affected area.
- If hazing/swirling are still present, perform steps 7 to 13.
- If hazing/swirling are no longer present, continue to the next step.
- Apply detail spray to a clean microfiber towel, and then remove any residual polish from the body panel.
- Using an inspection light and another clean microfiber towel, perform a final inspection and cleaning of the affected area. Check all adjacent body panels and gaps.
READ NEXT:
 Gas Strut - Hood - LH (Remove and Replace)
Remove
Open the hood.
Use a prop to attach the hood assembly in the open position.
Release the clip that attaches the hood gas strut to the hood mount.
Release the clip that attaches t
SEE MORE:
Tesla Badge - Rear (Remove and Replace)
SPECIAL TOOLS
Kit, Badge Removal (1453028-00-A)
Fixture, Rear Badge, Model 3 (1134703-00-A)
Remove
Prepare the badge removal tool with approximately 60 centimeters of
monofilament line.
Raise the trunk lid, and position the badge removal tool so that the
monofilament line cuts under a corn
Reflex Lens - Rear - RH (Remove and Replace)
Remove
Note: This procedure applies only to the RH side. The LH rear
reflex lens is part of the charge port.
Apply masking around the RH rear reflex lens.
Use a plastic trim tool to release the clips that attach the RH rear
reflex lens to the body, and then remove the RH rear reflex lens f
© 2019-2026 Copyright www.tmodel3.com
