Tesla Model 3: Sensor - Cabin Temperature (Remove and Replace)
Tesla Model 3 2017-2026 Service Manual / Thermal Management / Cabin HVAC / Sensor - Cabin Temperature (Remove and Replace)
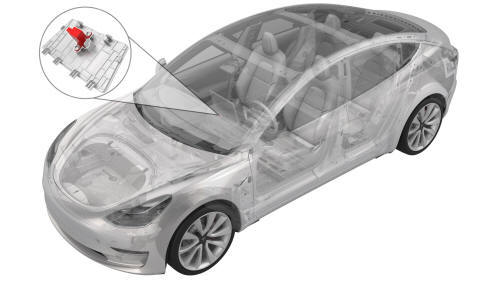
Note: This procedure was formulated using a release candidate or production model. Follow safety requirements and use extreme caution when working on or near high-voltage systems and components.
Remove
- Open the LH front door.
- Lower the LH front window.
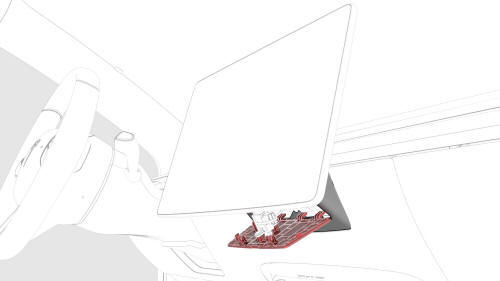
- Release the clips that attach the service panel to the touchscreen, and then disconnect the electrical connector from the sensor.
- Remove the service panel from the touchscreen.
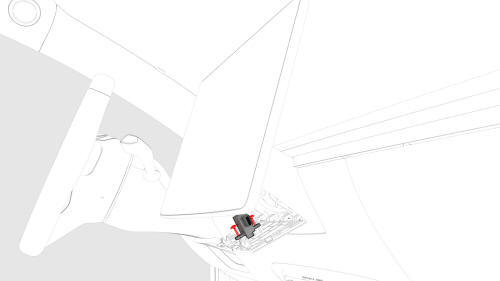
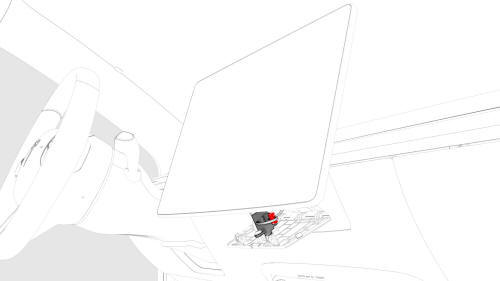
- Remove the bolts that attach the cabin temperature sensor to the
touchscreen, and then remove the sensor.
 Torque 0.7 Nm

Install
Installation procedure is the reverse of removal.
READ NEXT:
 Sensor - Temperature - Evaporator (Remove and Replace)
Remove
Remove the driver floormat.
Remove the LH center console side panel carpet. See
Carpet - Side Panel - Center Console - LH (Remove and Replace).
Disconnect the evaporator temperature
Sensor - Temperature - LH (Remove and Replace)
Remove
Remove the driver floormat.
Remove the center console LH side carpet. See
Carpet - Side Panel - Center Console - LH (Remove and Replace).
Disconnect the LH temperature sensor electri
Sensor - Temperature - RH (Remove and Replace)
Remove
Remove the RH center console side panel carpet. See
Carpet - Side Panel - Center Console - LH (Remove and Replace).
Disconnect the electrical wiring harness conector from the RH
tem
SEE MORE:
Link - Aft - Lower - Rear - LH (Remove and Replace)
Link - Aft - Lower - Rear - LH - Remove
SPECIAL TOOLS
Tool, Spring Compressor, Hook, Model 3
(1135103-00-A)
Tool, Rear Ride Height Torque, Model 3
(1137855-00-A)
Quad Camera Cover - Lower (Remove and Replace)
Remove
Use a trim tool to remove the lower quad camera cover.
Remove the tether from the lower quad camera cover, and then remove the
lower quad camera cover.
Install
Installation procedure is the reverse of removal.
© 2019-2026 Copyright www.tmodel3.com
