Tesla Model 3: Taillight - LH - Install
Tesla Model 3 2017-2024 Service Manual / Electrical / Exterior Lights / Taillight - LH (Remove and Replace) / Taillight - LH - Install
Install
- If the taillight is to be reinstalled, replace the gaskets from around each taillight mounting bolt (x2) and the taillight electrical connector (x1).
- Install new grommets onto the vehicle.
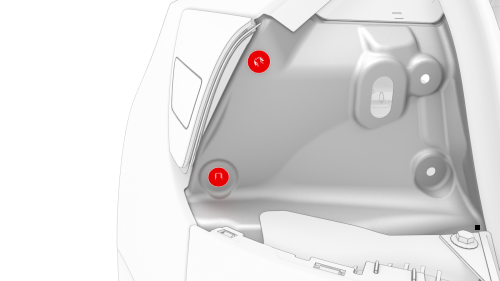
- Position the LH taillight studs into the grommets, and then install the taillight onto the vehicle.
Note: Reseat the trunk seal over the LH taillight.

- Install the nuts that attach the taillight to the vehicle.
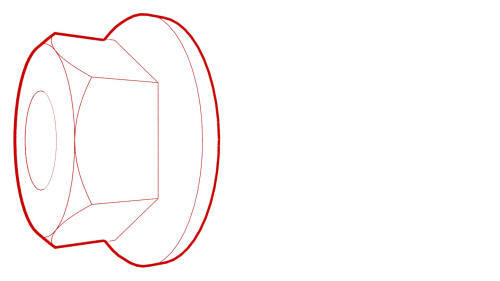 Torque 3.2 Nm
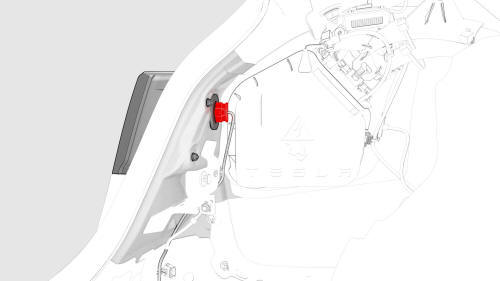
- Connect the electrical harness to the taillight connector.
- Install the trunk side trim.
- For the LH side, see Trim - Side - Trunk - LH (Remove and Replace).
- For the RH side, see Trim - Side - Trunk - RH (Remove and Replace).
- Install the trunk sill trim. See Trim - Sill - Trunk (Remove and Replace).
- Install the LH 2nd row seatback. See Seat Back - 2nd Row - LH (Remove and Install).
- Install the LH 2nd row seat side bolster. See Bolster - Side - Seat - 2nd Row - LH (Remove and Replace).
- Install the 2nd row lower seat cushion. See Seat Cushion - Lower - 2nd Row (Remove and Replace).
- Install the trunk floor trim. See Trim - Floor - Trunk (Remove and Replace).
.jpg)
- Use the bump stop removal tool to install the LH trunk stop.
READ NEXT:
 Reflex Lens - Rear - RH (Remove and Replace)
Remove
Note: This procedure applies only to the RH side. The LH rear
reflex lens is part of the charge port.
Apply masking around the RH rear reflex lens.
Use a plastic trim tool to release th
Reflector - Fascia - Rear - LH (Remove and Replace)
Remove
Remove the rear fascia assembly and place it on a padded surface. See
Fascia - Rear (Remove and Install).
Remove the rear fascia assembly and place it on a padded surface. See
Fascia
SEE MORE:
TXV Valve - Evaporator- Remove
Remove
Disconnect 12V power. See 12V Power (Disconnect and Connect).
Remove the underhood storage unit. See Underhood Storage Unit (Remove
and Replace).
Recover the A/C refrigerant. See A/C Refrigerant (Recovery and
Recharge).
Note: The following steps can be performed while the
refriger
Panel - Lower Rear - Center Console (Remove and Replace)
Remove
Move the driver seat and front passenger seat fully forward.
Note: Notice the location of the driver seat and front passenger
seat prior to moving them forward to help restore the seats back into their
original position.
Release the clips that attach the center console lower rear
© 2019-2024 Copyright www.tmodel3.com
