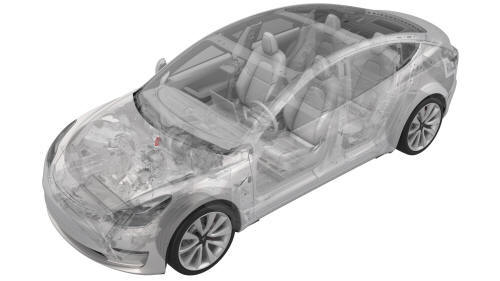
Tesla Model 3: TXV Valve - Evaporator- Remove
Tesla Model 3 2017-2024 Service Manual / Thermal Management / Refrigerant System / TXV Valve - Evaporator (Remove and Replace) / TXV Valve - Evaporator- Remove
Remove
- Disconnect 12V power. See 12V Power (Disconnect and Connect).
- Remove the underhood storage unit. See Underhood Storage Unit (Remove and Replace).
- Recover the A/C refrigerant. See A/C Refrigerant (Recovery and Recharge).
Note: The following steps can be performed while the refrigerant is recovered.
- Remove the inner HVAC plenum duct. See Duct - HVAC Plenum - Inner (Remove and Replace).
- Remove the cover for the 12V positive terminal.
.jpg)
- Loosen the nut that attaches the positive harness to the battery, and then remove the harness from the battery.
.png)
- Release the clip that attaches the suction/liquid lines to the electrical harness near the TXV.
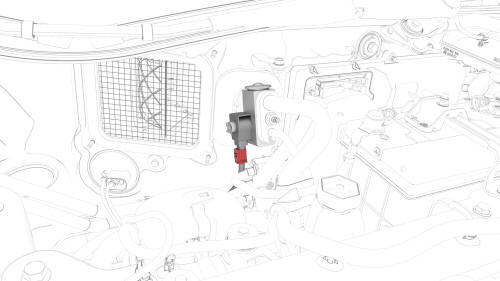
- Disconnect the electrical harness from the TXV valve connector.
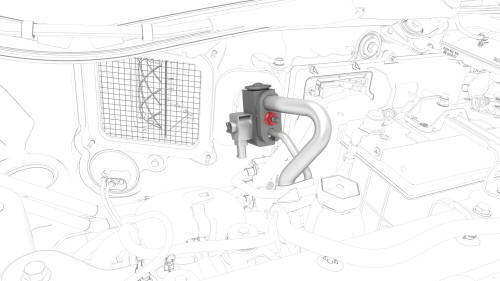
- After the refrigerant has been fully recovered, remove the nut that attaches the suction/liquid lines fitting to the TXV valve, and then remove the fitting from the TXV valve.
- Remove and discard the o-rings (x2) from the suction/liquid lines fitting.
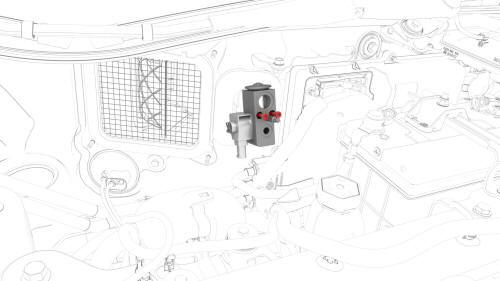
- Remove the bolts that attach the TXV valve to the HVAC module, and then
remove the TXV valve from the HVAC module.
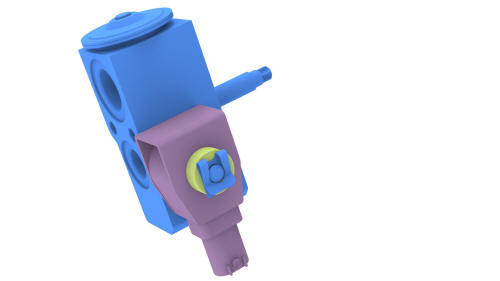
- Remove and discard the o-rings (x2) from the HVAC module.
READ NEXT:
 TXV Valve - Evaporator - Install
Install
Install new o-rings (x2) onto the HVAC module.
Install the TXV valve onto the HVAC module, and then install the bolts
that attach the TXV valve to the HVAC module.
Torque 7.2 Nm
Ins
SEE MORE:
Seal - Inner Belt - Front Door - LH (Remove and Replace)
Remove
Remove the LH front door trim panel. See
Panel - Door Trim - Front - LH (Remove and Replace).
Remove the rear of the inner belt seal from the door.
Release the rest of the seal from the door, and then remove the seal
from the door.
Install
Installation procedure is the rever
Cover - Airbag - Knee - Driver (Remove and Replace)
Note:
This procedure was formulated using a release candidate or production
model. Follow safety requirements and use extreme caution when working on or
near high-voltage systems and components.
Remove
Remove the driver knee airbag.
Use a flat head screwdriver to apply pressure along t
© 2019-2024 Copyright www.tmodel3.com
