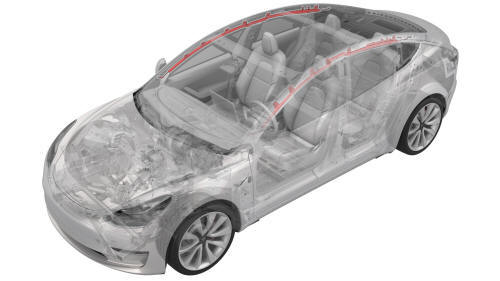
Tesla Model 3: Airbag - Curtain - LH - Remove
Tesla Model 3 2017-2024 Service Manual / Safety and Restraint / Airbags / Airbag - Curtain - LH (Remove and Replace) / Airbag - Curtain - LH - Remove
DRAFT
Warning:
This procedure was derived from pre-production computer models, and might not reflect the real-world situation. Warnings and cautions might be missing. Follow safety requirements and use extreme caution when working on or near high voltage systems and components.
Remove
- Disconnect 12V power. See 12V Power (Disconnect and Connect).
- Remove the headliner. See Headliner (Remove and Install).
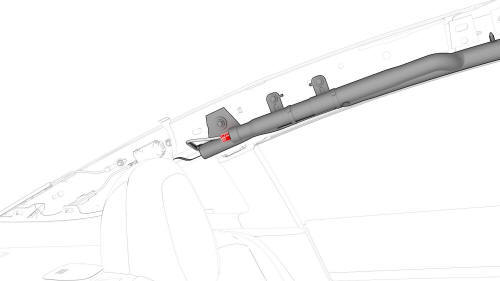
- Disconnect the electrical harness from the LH curtain airbag connector.
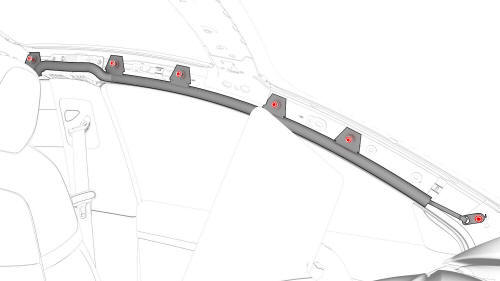
- Remove the bolts that attach the front and center portions of the LH curtain airbag to the body.
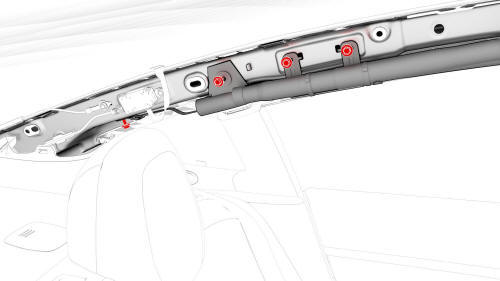
- Remove the bolts that attach the rear portion of the LH curtain airbag to the body.
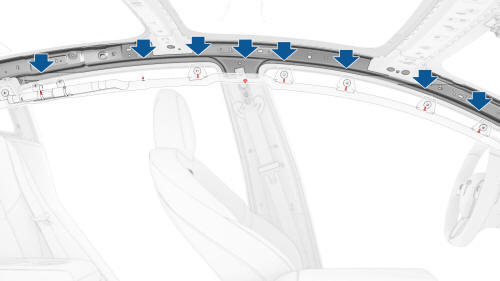
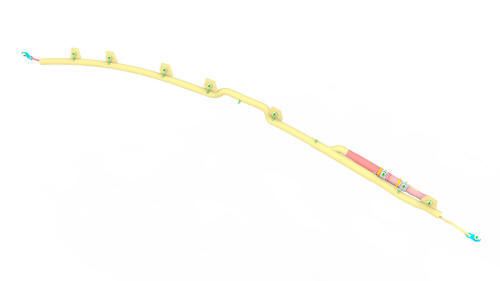
- Carefully release the clips (x8) that attach the LH curtain airbag to the side rail, and remove the airbag from the vehicle.
Warning: If any clips are damaged, the airbag must be replaced
READ NEXT:
 Airbag - Curtain - LH - Install
Install
Install the LH curtain airbag to the side rail, and then carefully
fasten the clips (x8) that attach the airbag to the side rail.
Warning: If any clips are damaged, the airbag must be r
Airbag - Driver (Remove and Replace)
Remove
Remove the 2nd row lower seat cushion. See Seat Cushion - Lower - 2nd
Row (Remove and Replace).
Remove the rear underhood apron. See Underhood Apron - Rear (Remove and
Replace).
Disco
Airbag - Front Passenger (Remove and Install)
DRAFT
Warning: This procedure was derived from pre-production
computer models, and might not reflect the real-world situation. Warnings and
cautions might be missing. Follow safety requireme
SEE MORE:
Secure the Tires
The vehicle's tires must be secured onto the
truck using the eight-point tie-down method.
Ensure any metal parts on the tie-down
straps do not contact painted surfaces or
the face of the wheels.
Do not place tie-down straps over body
panels or through the wheels.
Caution: Attachi
Horn - Low Tone (Remove and Replace)
Remove
Remove the front fascia. See
Remove.
Disconnect the harness from the low tone horn connector.
North America
Remove the bolt that attaches the horn to the carrier, and remove the
horn from the vehicle.
Torque 9 Nm
EMEA
Install
Installation procedure is the reverse of
© 2019-2024 Copyright www.tmodel3.com
