Tesla Model 3: Armrest - 2nd Row (Remove and Replace)
Tesla Model 3 2017-2026 Service Manual / Seats / 2nd Row Seat Assemblies and Hardware / Armrest - 2nd Row (Remove and Replace)
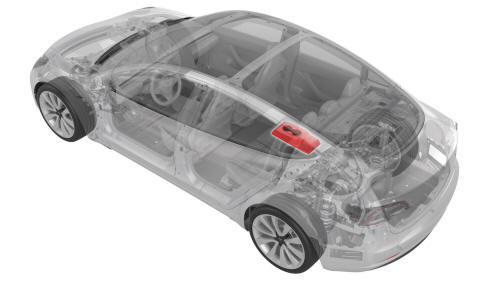
Remove
- Open all four doors and move the front LH and RH seats fully forward.
- Fold down the RH 2nd row seatback assembly.
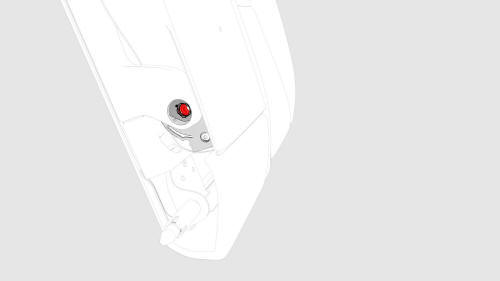
- Remove the bolt that attaches the 2nd row armrest to the LH 2nd row seat
back assembly.
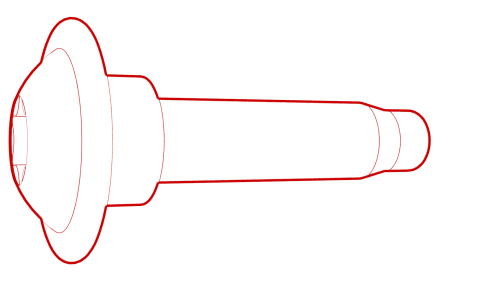 Torque 15 Nm
 - Pull the RH side of the 2nd row center armrest towards the front of the
vehicle, and then slide the 2nd row armrest out of the LH 2nd row seat back
assembly.
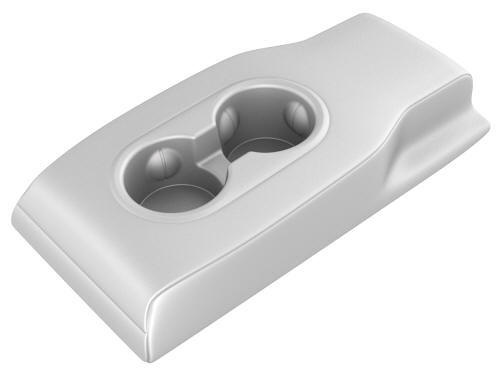
Install
Installation procedure is the reverse of removal.
READ NEXT:
 Bezel - Handle - Seat Back - 2nd Row - LH (Remove and Replace)
Remove
Release the LH 2nd row seat back and fold it slightly forward.
Use a pry tool to release the clips (x2) that attach the LH 2nd row seat
back handle bezel to the LH 2nd row seat back h
Bolster - Side - Seat - 2nd Row - LH (Remove and Replace)
Remove
Fold down the LH 2nd row seat.
Pull the 2nd row side bolster inward, and then move the bolster up to
remove from the vehicle.
Remove and discard the bolster plastic bracket from t
Bracket - Hinge - Seat Back - 2nd Row - LH (Remove and Replace)
Remove
Remove the 2nd row lower seat cushion. See
Seat Cushion - Lower - 2nd Row (Remove and Replace).
Remove the LH 2nd row seat side bolster. See
Bolster - Side - Seat - 2nd Row - LH (Remove
SEE MORE:
Mount - Rear Drive Unit - LH (Remove and Replace)
DRAFT
Warning:
This procedure was derived from pre-production computer
models, and might not reflect the real-world situation. Warnings
and cautions might be missing. Follow safety requirements and
use extreme caution when w
Switch - Steering Wheel - LH (Remove and Replace)
Remove
Remove the driver airbag. See Airbag - Driver (Remove and Replace).
Disconnect the steering wheel electrical wiring harness from the
connector.
Disconnect the electrical harness from the LH steering wheel switch
connector.
Disconnect the electrical harness from the RH s
© 2019-2026 Copyright www.tmodel3.com
