Tesla Model 3: Bracket - 12V Battery (RWD) -Install
Tesla Model 3 2017-2024 Service Manual / Electrical / 12V Battery and Fuses / Bracket - 12V Battery (RWD) (Remove and Replace) / Bracket - 12V Battery (RWD) -Install
Install
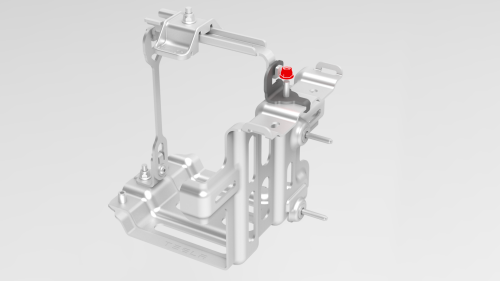
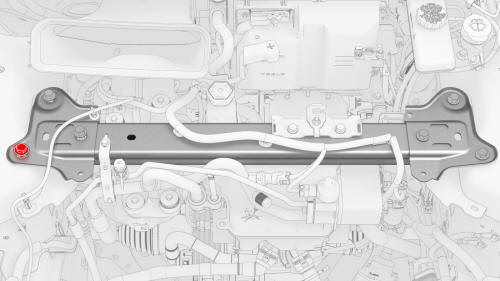
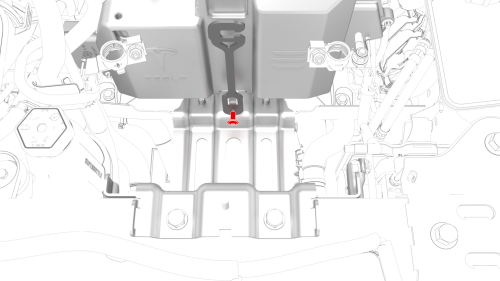
- Install the front hook onto the battery bracket, and then install a new
nut to attach the front hook to the battery bracket.
 Torque 9 Nm
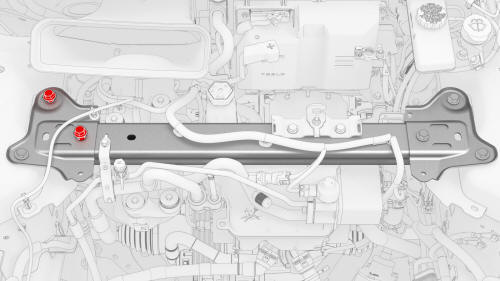
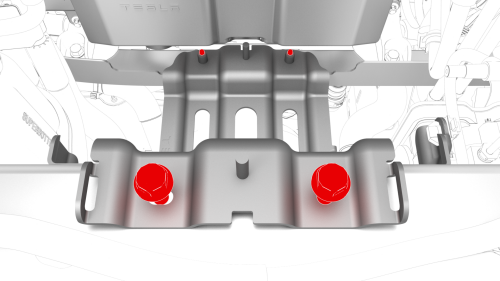
- Install the tie down bracket onto the battery bracket, and then install
a new nut to attach the tie down bracket to the battery bracket.
 Torque 9 Nm
 - Install the battery bracket to the shock tower brace and battery beam, and then shift the LH side of the shock tower brace rearward so that the bolt holes in the brace and shock tower align..
- Install the outer bolt that attaches the shock tower brace to the LH
shock tower.
.jpg) Torque 62 Nm
Torque 62 Nm
- Install the inner bolts (x2) that attach the shock tower brace to the LH
shock tower.
.jpg) Torque 67 Nm
Torque 67 Nm
.jpg) Torque 67 Nm
Torque 67 Nm
- Tighten the outer bolt that attaches the shock tower brace to the RH
shock tower.
Torque 62 Nm
- Tighten the inner bolts (x2) that attach the shock tower brace to the RH
shock tower.
Torque 67 Nm
Torque 67 Nm
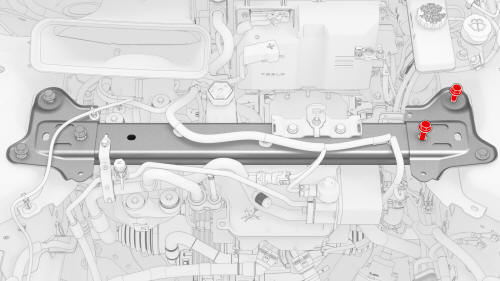
- Install the upper bolts (x2) that attach the battery bracket to the
shock tower brace, and the lower bolts (x2) that attach the battery bracket
to the battery beam.
.jpg) Torque upper bolts 15 Nm
Torque upper bolts 15 Nm
.png) Torque lower bolts 9 Nm
Torque lower bolts 9 Nm
Note: Reach through under the superbottle to gain access to the underside of the battery beam and the lower bolts.
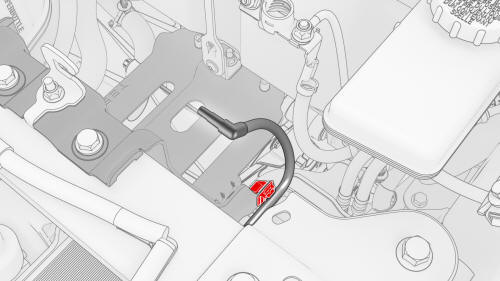
- Fasten the clip that attaches the 12V battery vent hose to the 12V battery bracket.
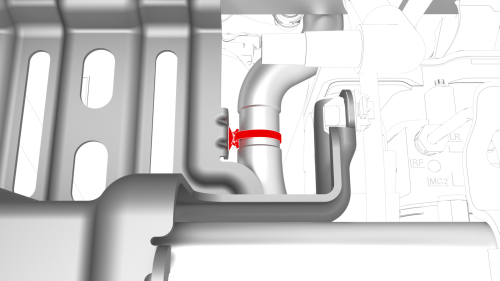
- Fasten the clip that attaches the coolant hose to the battery bracket.
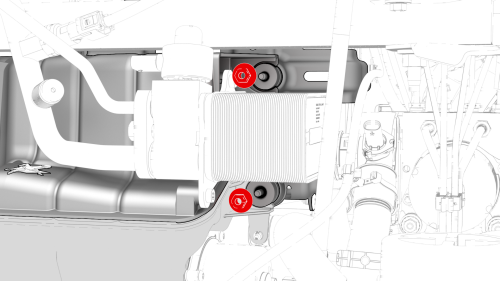
- Install the nuts (x2) that attach the superbottle to the thermal beam.
 Torque 8 Nm
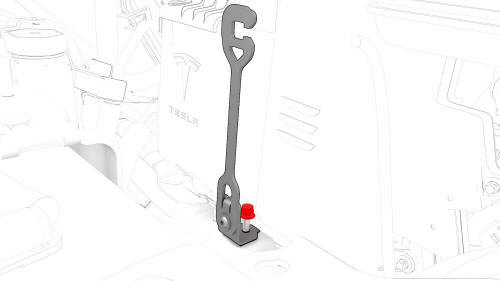
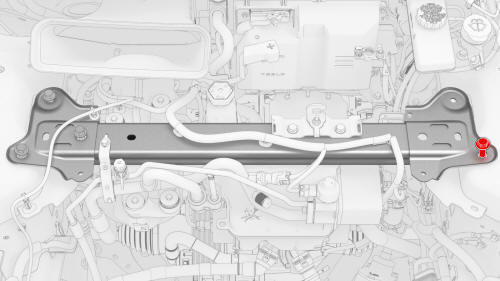
- Install the 12V battery rear hook tie down to the body, and then install
the bolt that attaches the tie down to the body.
 Torque 9 Nm
 - Install the 12V auxiliary battery. See Battery - 12V (Remove and Replace).
- Connect 12V power. See 12V Power (Disconnect and Connect).
- Install the cowl screen panel. See Panel - Cowl Screen (Remove and Replace).
- Install the LH and RH shock tower covers. See Cover - Shock Tower - LH (Remove and Replace).
- Install the LH and RH wiper arms. See Wiper Arms (Remove and Replace).
- Install the underhood storage unit. See Underhood Storage Unit (Remove and Replace).
- Install the cabin intake duct. See Duct - Cabin Intake (Remove and Replace).
- Install the rear underhood apron. See Underhood Apron - Rear (Remove and Replace).
- Install the 2nd row lower seat cushion. See Seat Cushion - Lower - 2nd Row (Remove and Replace).
READ NEXT:
 Strap - 12V Battery (Remove and Replace)
Remove
Remove the rear underhood apron. See
Underhood Apron - Rear (Remove and Replace).
Remove the cabin intake duct. See
Duct - Cabin Intake (Remove and Replace).
Loosen the nut that atta
Vehicle Electrical Isolation Procedure
SPECIAL TOOLS
Insulation Multimeter, Fluke 1507 (1076921-00-B)
Test Probes, Slim, Fluke TP38 (1130480-00-A)
Warning: This procedure verifies that high voltage power is no
longer available to high vol
Vent Hose - 12V Battery (Remove and Replace)
Remove
Remove the rear underhood apron. See
Underhood Apron - Rear (Remove and Replace).
Remove the cabin intake duct. See
Duct - Cabin Intake (Remove and Replace).
Remove the hood latch cover
SEE MORE:
Light - Side Repeater - Front - LH (Remove and Replace)
Remove
Raise and support the vehicle. See Raise Vehicle - 2 Post Lift.
Apply protective tape to the LH fender around the front side repeater
light.
Remove the LH front wheel. See Wheel (Remove and Install).
Remove the LH front wheel arch liner. See Wheel Arch Liner - Front - LH
(Remove an
Frame - Seat Back - 2nd Row - LH (Remove and Replace)
Remove
Remove the 2nd row lower seat cushion. See
Seat Cushion - Lower - 2nd Row (Remove and Replace).
Remove the LH 2nd row seat side bolster. See
Bolster - Side - Seat - 2nd Row - LH (Remove and Replace).
Remove the rear LH sill panel trim. See
Trim - Sill Panel - Rear - LH (Remove and R
© 2019-2024 Copyright www.tmodel3.com
