Tesla Model 3: Rail - 2nd Row - Outer - LH (Remove and Replace)
Tesla Model 3 2017-2026 Service Manual / Seats / 2nd Row Seat Assemblies and Hardware / Rail - 2nd Row - Outer - LH (Remove and Replace)
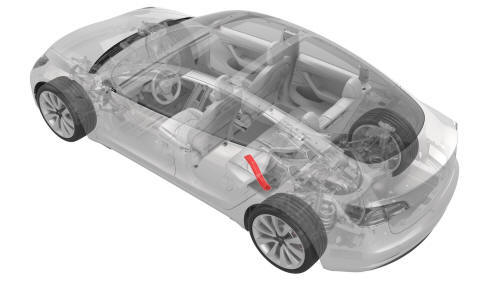
Remove
- Remove the 2nd row lower seat cushion. See Seat Cushion - Lower - 2nd Row (Remove and Replace).
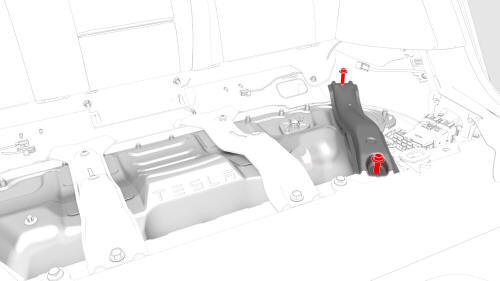
- Remove the bolts that attach the outer 2nd row rail to the body, and
then remove the rail from the vehicle.
Torque 24 Nm
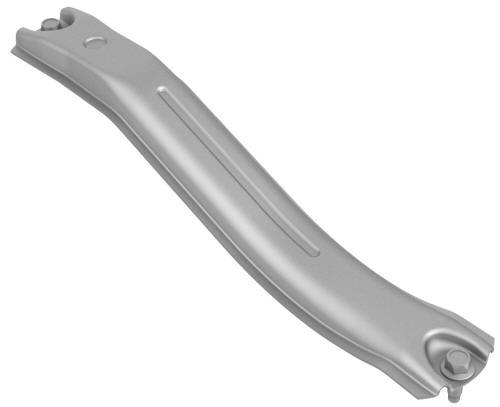
Install
Installation procedure is the reverse of removal.
READ NEXT:
 Seat Back - 2nd Row - LH (Remove and Install)
Remove
Remove the 2nd row lower seat cushion. See
Seat Cushion - Lower - 2nd Row (Remove and Replace).
Remove the LH 2nd row seat side bolster. See
Bolster - Side - Seat - 2nd Row - LH (Remove
Seat Back - 2nd Row - RH (Remove and Install)
Remove
Remove the 2nd row lower seat cushion. See
Seat Cushion - Lower - 2nd Row (Remove and Replace).
Remove the RH 2nd row seat side bolster. See
Bolster - Side - Seat - 2nd Row - LH (Remove an
Seat Cushion - Lower - 2nd Row (Remove and Replace)
Remove
Move the driver seat and the front passenger seat fully forward.
Note: Note the position of the driver seat and the front passenger
seat prior to movement so that both seats are restored
SEE MORE:
Overview
This section provides the main information about the Tesla Model 3 car, describing its key characteristics, technologies and capabilities.
Here is a general description of the interior and exterior, including details about the interior design, materials used, seating configuration, storage space an
Gasket - Cover - HV Battery (Remove and Replace)
Remove
Note: There are two types of HV battery cover gaskets: an older
platter perimeter gasket, and a newer penthouse perimeter gasket. These are
referred to as platter type and penthouse type. This procedure removes both
types, but installs only the penthouse type gasket.
Remove the HV batter
© 2019-2026 Copyright www.tmodel3.com
