Tesla Model 3: Remove Dirt Inclusion
- Apply isopropyl alcohol to the general area of the defect, and then wipe the area with a clean microfiber towel.
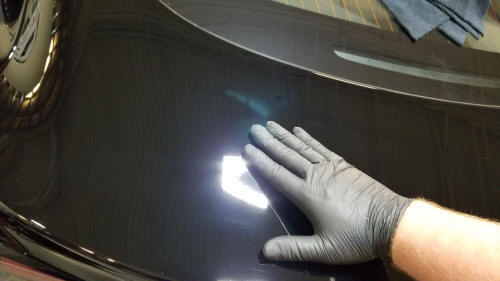
- While wearing a nitrile glove, run hand over the area around the dirt inclusion and check for fine bumps in the paint.
- If bumps are detected, perform clay treatment on the area before proceeding to the next step.
- If no bumps are detected, proceed to the next step.
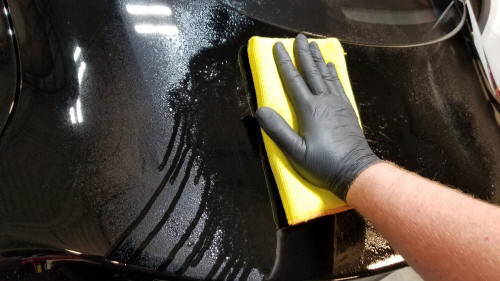
- Apply detail spray to the affected area, and clean the affected area with a decontamination mitt using light and straight passes. Continue to the next step when the mitt no longer drags on the paint.
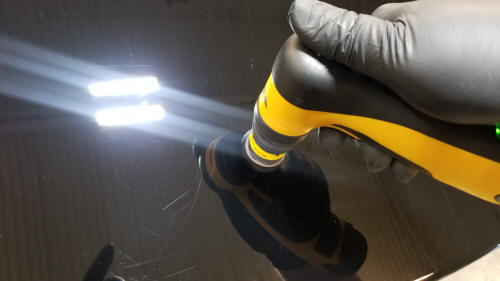
- Install a new sanding disc on the sander.
- Spray the sanding disc with water.
- Set the sander speed according to region, and while the sander is off, place the disc on top of the dirt inclusion.
- NA: lowest speed
- APAC: TBD
- EMEA: TBD
- Keeping the disc stationary and flush with the body panel, activate the sander for 3 seconds, and then turn off the sander.
- NA: setting 5
- APAC: TBD
- EMEA: TBD
- Keeping the pad flush with the body panel, activate the buffer.
- Apply pressure until the buffer begins to stall, and then reduce pressure until the buffer rotates normally.
- At a rate of 1 inch per second, move the buffer side to side in a 6 inch area centered on the paint inclusion.
Caution:
Keep the tool level and continuously moving.
- Turn the buffer off after 15 seconds or when the cutting compound begins to dissipate. Remove the buffer from the body panel only when the pad stops spinning.
- Remove the cutting compound from the body panel with a clean microfiber towel.
- Inspect the affected area.
- If sanding marks are still present, perform steps 6 to 13.If sanding
- If sanding marks are no longer present, and only hazing/swirling remain, continue to the next step.
- Turn on the buffer, and then clean the pad with a pad cleaning brush.
- With the buffer still running, use a microfiber towel to remove as much residual compound as possible from the pad, and then turn off the buffer.
READ NEXT:
 Polish
Remove the cutting pad from the buffer, and then install a polishing pad on
the buffer.
Apply 4 evenly spaced 20 mm diameter dollops of polishing compound on the
polishing pad.
Set the buffer speed
SEE MORE:
Serial Numbers
Tesla labels or engraves serial numbers on its parts. Tesla serial numbers
are 14 digits and alphanumeric. Tesla serial numbers are encoded.
Use this system to decode a Tesla serial number:
Digits 1-3
Build
Site Code
***
= Unique 3 character code assigned by Tesla to
Tire - Front - LH (Rebalance)
DRAFT
Warning:
This procedure was derived from pre-production computer
models, and might not reflect the real-world situation. Warnings
and cautions might be missing. Follow safety requirements and
use extreme caution when working on or near high volta
© 2019-2026 Copyright www.tmodel3.com
