Tesla Model 3: Trim - Package Tray (Remove and Install) - Install
Tesla Model 3 2017-2024 Service Manual / Interior Trim / Luggage Compartment Trim / Trim - Package Tray (Remove and Install) / Trim - Package Tray (Remove and Install) - Install
Install
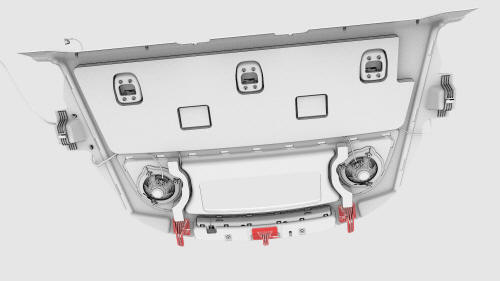
- Install the package tray trim to the vehicle.
Note: Slide the package tray rearwards to install it to the vehicle, and then attach the package tray to the body with tabs.
.jpg)
- Install the clips that attach the package tray trim to the body.
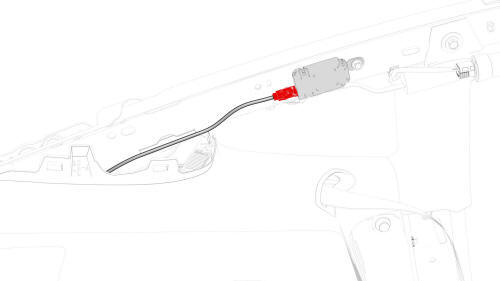
- Connect the electrical connector to the antenna amplifier
- Install the clip that attaches the antenna amplifier wiring harness to the body.
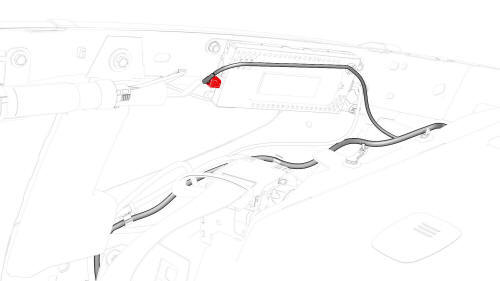
- Connect the speaker harness connector to the tuner.
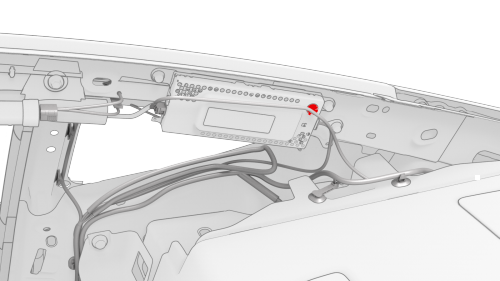
- Install the clip that attaches the speaker wiring harness to the tuner.

- Connect the package tray harness connector to the RH body electrical harness.
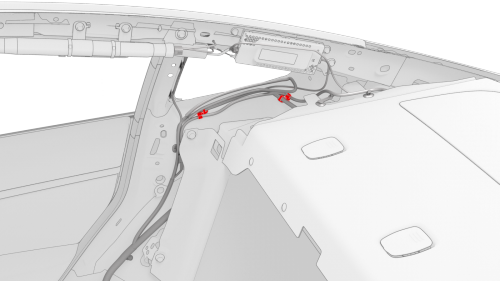
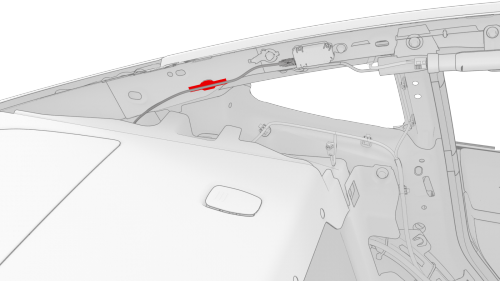
- Install the clips that attach the package tray wiring harness to the C-pillar.
- Install the RH rear C-pillar trim. See Trim - C-Pillar - Rear - LH (Remove and Replace).
- Install the RH side rail trim. See Trim - Side Rail - LH (Remove and Install).
- Install the RH 2nd row seat side bolster. See Bolster - Side - Seat - 2nd Row - LH (Remove and Replace).
- Install the LH rear C-pillar trim. See Trim - C-Pillar - Rear - LH (Remove and Replace).
- Install the LH upper C-pillar trim. See Trim - C-Pillar - Upper - LH (Remove and Replace).
- Install the LH side rail trim. See Trim - Side Rail - LH (Remove and Replace).
- Install the LH 2nd row seat side bolster. See Bolster - Side - Seat - 2nd Row - LH (Remove and Replace).
- Install the 2nd row lower seat cushion. See Seat Cushion - Lower - 2nd Row (Remove and Replace).
READ NEXT:
 Underhood Storage Unit (Remove and Replace) -
Remove
Underhood Storage Unit (Remove and Replace) -
Remove
Remove
Remove the rear underhood apron. See
Underhood Apron - Rear (Remove and Replace).
Remove the cabin intake duct. See
Duct - Cabin Intake (Remove and Replace).
Remove the hood latch cove
Underhood Storage Unit (Remove and Replace) -
Install
Install
Install the reinforcement clips that are attached to the underhood
storage unit, if installing a new the underhood storage unit. Otherwise,
skip to the next step if reusing the underh
SEE MORE:
Cover - Hood Latch (Remove and Replace)
Remove
Open the hood.
Release the clips that attach the hood latch cover to the body.
Tip: Grab the cover from the bottom, and then pull it
upward to release the clips.
Disconnect the electrical harness from the child safety switch
connector, and then remove the cover from t
Switch - Steering Wheel - LH (Remove and Replace)
Remove
Remove the driver airbag. See Airbag - Driver (Remove and Replace).
Disconnect the steering wheel electrical wiring harness from the
connector.
Disconnect the electrical harness from the LH steering wheel switch
connector.
Disconnect the electrical harness from the RH s
© 2019-2024 Copyright www.tmodel3.com
