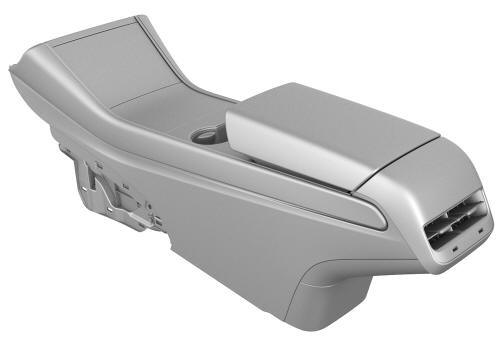
Tesla Model 3: Center Console (Remove and Install) - Remove
Tesla Model 3 2017-2025 Service Manual / Interior Trim / Center Console / Center Console (Remove and Install) / Center Console (Remove and Install) - Remove
Remove
- Remove and attach the customer's belongings from the center console, if needed.
- Remove the 2nd row lower seat cushion. See Seat Cushion - Lower - 2nd Row (Remove and Replace).
- Remove the rear underhood apron. See Underhood Apron - Rear (Remove and Replace).
- Remove the driver floormat.
- Remove the LH center console side panel carpet. See Carpet - Side Panel - Center Console - LH (Remove and Replace).
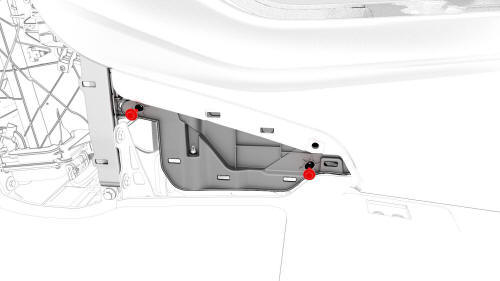
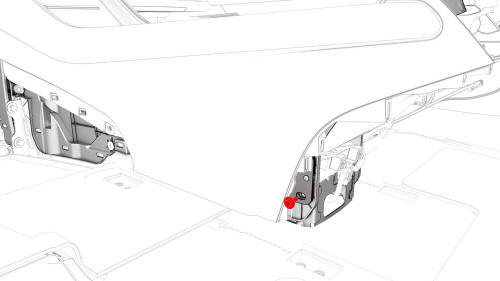
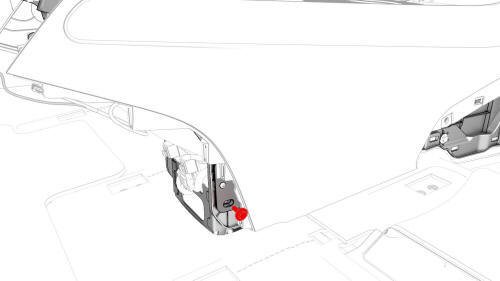
- Remove the bolts that attach the LH front of the center console to the body.
- Remove the front passenger floormat.
- Remove the RH center console side panel carpet. See Carpet - Side Panel - Center Console - LH (Remove and Replace).
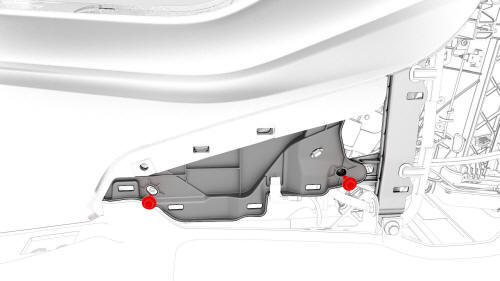
- Remove the bolts that attach the RH front of the center console to the body.
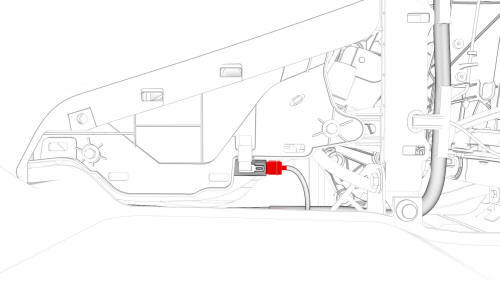
- Disconnect the electrical connector that is located at the RH front of the center console.
- Remove the phone tray. See Phone Tray - Center Console (Remove and Replace).

- Remove the bolts that attach the front of the center console to the body.
- Remove the center console lower rear panel. See Panel - Lower Rear - Center Console (Remove and Replace).
- Remove the bolt that attaches the LH rear of the center console to the body.
- Remove the bolt that attaches the RH rear of the center console to the body.
- On the touchscreen, select Control > Safety & Security > Vehicle Power > Power Off to power off the vehicle.
- Disconnect 12V power. See 12V Power (Disconnect and Connect).
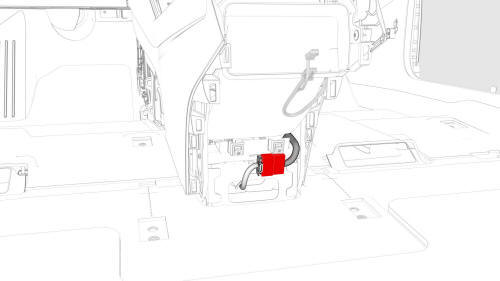
- Disconnect the electrical connector from the rear of the center console.
- Close the center console rotating lid to prevent it from getting stuck on the center display upon removal of the center console from the vehicle.
- With an assistant, remove the center console from the vehicle as follows:
- Tilt the rear of the center console upwards.
- Pull the center console towards the rear of the vehicle.
- Tilt the front of the center console upwards.
- Remove the center console through the passenger front door.
READ NEXT:
 Center Console (Remove and Install) - Install
Install
With an assistant, install the center console into the vehicle as
follows:
Tilt the front of the center console downwards.
Slide the center console towards the front of the vehicle.
T
Center Console (Remove and Replace)
Remove
Remove the center console assembly. See
Center Console (Remove and Install).
Install
With an assistant, install the center console into the vehicle as
follows:
Tilt the front of th
Cup Holder (Remove and Replace)
Remove
Disconnect 12V power. See
12V Power (Disconnect and Connect).
Remove the center console decor trim. See
Decor Trim - Center Console (Remove and Replace).
Remove the screws and rele
SEE MORE:
Subframe Assembly - Rear - Remove
SPECIAL TOOLS
Kit, EPB Release, Handheld (1134520-00-A)
XP-10 Power Supply, XP-10 (1129348-00-A)
Fixture, Subframe, Model 3 (1099645-00-B)
Lever Lock, HV Connector, Model 3 (1140311-00-A)
Remove
Use Toolbox to release the rear parking brakes. See Parking Brake -
Caliper - Rear - LH (Release).
Brake Pad Kit - Front (Sport Brakes)- Install
Install
Brush the LH front brake caliper and anti rattle
springs with soapy water.
Apply a thin layer of copper grease to the left and
© 2019-2025 Copyright www.tmodel3.com
